

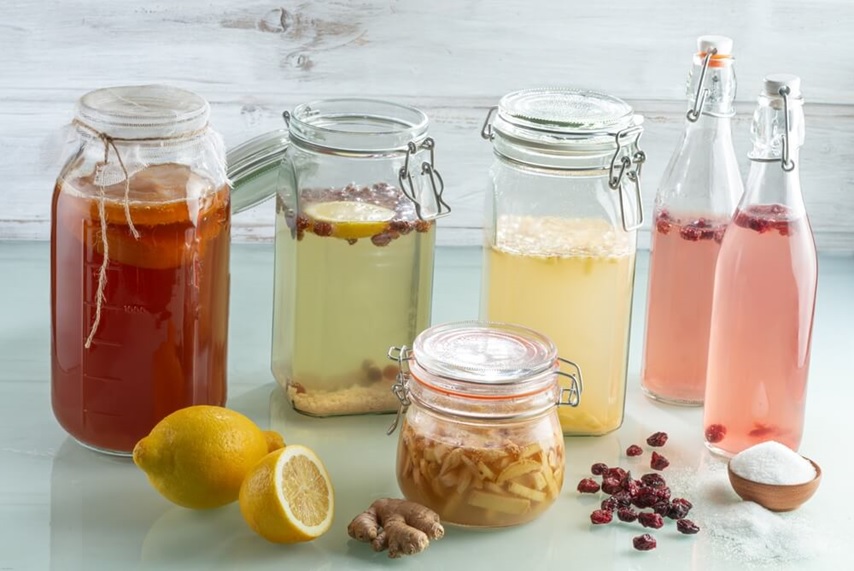
Walk into any Australian café these days and you’ll spot it on the menu somewhere, a side of sauerkraut, a kombucha on tap, maybe a kefir smoothie bowl. Fermented foods and kits in Australia have moved well beyond the niche health-food aisle and into everyday kitchens, and for good reason. Fermentation is one of the oldest food preservation techniques on the planet, and it just happens to produce foods that are packed with beneficial live cultures, deeper flavour, and better digestibility than their unfermented counterparts.
If you’ve been curious about starting your own fermentation journey at home but aren’t sure where to begin, this guide walks through the basics, what fermentation actually is, which foods are easiest to start with, and the simple kit essentials that make the process far less intimidating than it looks.
What Actually Happens When Food Ferments
At its core, fermentation is a controlled process where bacteria, yeasts, or other microbes break down sugars and starches in food. Depending on the microbes involved, this produces lactic acid (as in sauerkraut and kimchi), alcohol and carbon dioxide (as in kombucha and beer), or a combination of acids and gases that give fermented dairy its tang.
This isn’t just a flavour trick. The process can increase the bioavailability of certain nutrients, break down compounds that are otherwise hard to digest, and introduce live microbial cultures into your gut. It’s also remarkably forgiving, most home fermentation projects need little more than time, salt or a starter culture, and a container that lets gases escape safely.
Kefir: The Gateway Ferment for Most Beginners
If you’re only going to try one fermented food this year, kefir is usually the easiest entry point. Made by adding kefir grains, a symbiotic culture of bacteria and yeast, to milk (or a sugary water solution for the dairy-free version), kefir ferments at room temperature over roughly 24 hours into a tangy, slightly effervescent drink.
Unlike yoghurt, kefir doesn’t need a thermometer or a heat source, which makes it genuinely low-maintenance once you’ve got your grains established. Strain it, feed the grains fresh milk or water, and repeat. Many home fermenters find they can maintain a rotating batch indefinitely, sharing surplus grains with friends as the culture multiplies over time.
Kombucha: Australia’s Favourite Fizzy Ferment
Few fermented drinks have captured the Australian market quite like kombucha. Built on a SCOBY (symbiotic culture of bacteria and yeast) fermenting sweetened tea, kombucha takes anywhere from one to three weeks for a first fermentation, depending on temperature and how tart you like the result.
The appeal for home brewers is partly cost, a bottle of good kombucha at the shops can run several dollars, while brewing your own at home costs a fraction of that once you’ve got a healthy SCOBY going. It’s also endlessly customisable. A second fermentation with fruit, ginger, or herbs added to bottled kombucha creates natural carbonation and flavour variations that are hard to find in commercial versions.
Temperature matters more with kombucha than with most other ferments. In the warmer states, fermentation moves faster and needs closer monitoring to avoid over-souring; in cooler climates, patience is the main requirement.
Building a Simple Fermentation Toolkit
You don’t need a dedicated fermentation room to get started, but a handful of tools make the process considerably smoother and reduce the trial-and-error involved.
- Wide-mouth glass jars with airlock lids or loose-fitting covers, to allow gas to escape during active fermentation without inviting contamination.
- A reliable set of fermentation jars designed specifically for vegetable ferments, which typically include weights to keep produce submerged under brine.
- Non-iodised salt, since iodine and anti-caking agents in table salt can interfere with the fermentation process.
- A digital scale, useful for getting salt-to-vegetable ratios consistent across batches.
For those keen to branch into cultured dairy alternatives, a bamboo tofu press is a handy addition to the kit. While traditionally used for pressing excess liquid from tofu, the same principle applies to soft cultured cheeses and plant-based ferments, even pressure distributed through natural bamboo slats helps achieve a consistent texture without the moisture pooling that plastic presses can cause.
Why Bother? The Practical Benefits of Home Fermentation
Beyond the novelty factor, there are a few genuinely practical reasons fermentation has stuck around as a household skill rather than fading into a fad. Cost is one of the more obvious ones, a jar of sauerkraut or a bottle of kombucha bought ready-made is rarely cheap, and the ingredients to make several litres at home cost a fraction of the shelf price. Once the initial equipment is sorted, ongoing batches cost little more than the raw produce, tea, or milk involved.
There’s also a preservation angle that’s easy to overlook in an era of refrigeration. Fermenting vegetables extends their usable life well beyond what raw storage allows, which matters if you’re working through a glut from a home garden or a bulk purchase from the local market. A head of cabbage that would otherwise wilt within a week can become a jar of sauerkraut that keeps for months.
Then there’s the flavour dimension. Fermentation produces complex, tangy, umami-rich notes that simply don’t exist in the raw ingredient. Home fermenters often find that once they’ve tasted a proper naturally fermented pickle or a well-balanced kombucha, the commercial pasteurised versions, which lack the same live cultures and depth of flavour, feel flat by comparison.
Seasonal Considerations for Australian Climates
Australia’s climate diversity means fermentation timelines vary considerably depending on where you live. In tropical and subtropical regions of Queensland and the Northern Territory, ambient temperatures often sit well above the ideal range for slower ferments, which speeds things up but also increases the risk of over-fermentation or unwanted bacterial competition. Checking ferments daily rather than every few days is a sensible habit in warmer months.
In the cooler southern states, Victoria, Tasmania, and much of South Australia, winter temperatures can slow fermentation to a crawl. This isn’t necessarily a problem; slower ferments often develop more nuanced flavour, but it does mean adjusting expectations around timelines. A kombucha that ferments in five days over a Brisbane summer might take closer to two weeks during a Melbourne winter.
Humidity plays a role too, particularly for kefir grains and kombucha SCOBYs, which can be sensitive to sudden environmental shifts. Keeping ferments away from draughty windows, extractor fans, and direct afternoon sun helps maintain the steadier conditions these cultures prefer.
Common Beginner Mistakes (and How to Avoid Them)
Most fermentation failures come down to a handful of repeat offenders. Using chlorinated tap water can inhibit the very microbes you’re trying to cultivate, filtered or dechlorinated water works far better. Vegetables that float above the brine line are exposed to air and prone to mould, so a proper weight (or a clean cabbage leaf tucked over the top) matters more than it seems.
Temperature swings are another common culprit. Ferments left too close to a heater, in direct sun, or in a draughty spot can ferment unevenly. A stable spot around 18–22°C is ideal for most vegetable ferments, while kombucha and kefir tend to be a little more forgiving of minor fluctuations.
Finally, patience is genuinely part of the process. It’s tempting to taste-test daily and second-guess whether things are “working,” but most ferments need at least three to five days before you’ll notice meaningful changes in flavour and texture.
Where to Go from Here
Once you’ve had a win with one ferment, the natural next step is usually branching out, trying a vegetable ferment if you started with kefir, or attempting a second-fermentation kombucha flavour if your first batch turned out well. The equipment overlaps significantly between different ferments, so a modest initial investment in jars, weights, and a press tends to set you up for a lot of future experimentation.
Fermented foods and kits in Australia aren’t a passing trend, they represent a return to food preparation methods that predate refrigeration by thousands of years, adapted for a modern kitchen. Starting small, being consistent, and learning from the inevitable early mishaps is genuinely the fastest way to build confidence with the process.
